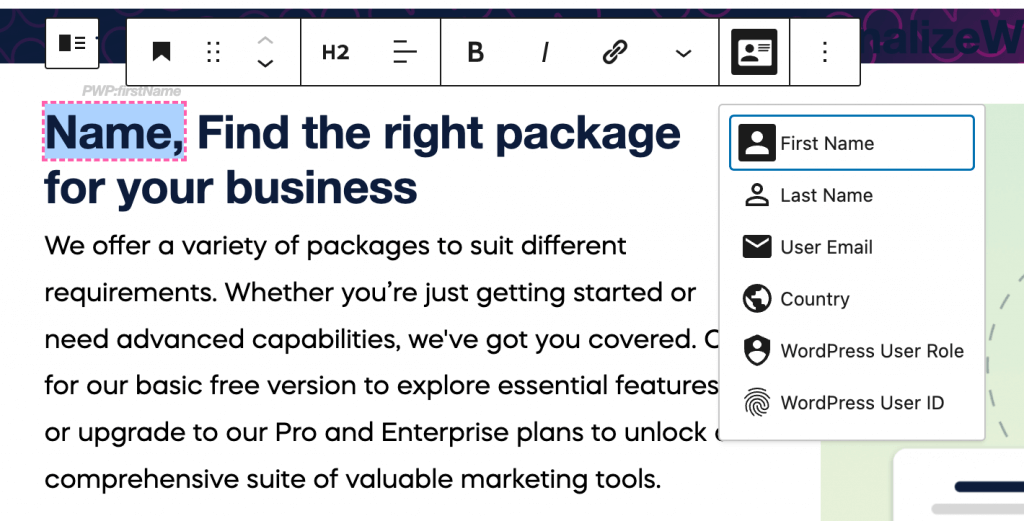
As part of the Pro version of PersonalizeWP, you can customise the content that is displayed to users by inserting data from their visitor profile into the text. This provides you with the ability to personalize content based on the information you know about them.
Inserting Visitor Profile Data
When adding content in the Block Editor, you can see an icon resembling a User Profile Card. If you click on this icon, you will be shown a dropdown menu that lists out the available profile data option you can use.
These include:
- First Name
- Last Name
- User Email
- Country
- WordPress User Role
- WordPress User ID

Adding Profile Data
It’s important when adding personalisation data that you provide a fallback in case you don’t have any profile data for a visitor to your site, and therefore you end up just displaying a white space.
Therefore the first step when adding data is to add your fallback text (i.e. Name in the example above). Select your fallback text, click on the Visitor Profile Card icon and choose which data you want the text to be replaced with, if the user has a known profile.
On the front-end, the fallback text will be swapped out with the relevant profile data field when it is rendered to users. And because PersonalizeWP works even when you’re using caching, the data will be specific to that particular visitor.


