Discover how form-based personalization can enhance user experience and engagement, helping you to tailor your content for each visitor.
How to Personalize Website Content Based on Form Submissions

Every visitor comes to your website with different needs, and those needs can change over time. Form submissions, whether a contact request, demo sign-up or service inquiry, offer key insights into their intent.
Instead of repeatedly showing the same CTA or pop-up, you can dynamically adjust their experience. If someone requests a demo, you could show them case studies. If they submit a support request, you could direct them to helpful resources instead of promotions. By personalizing content based on form submissions, you create a more relevant journey that keeps visitors engaged.
What You’ll Learn
1. Ways you can use form-based personalization.
2. How to set up form-based display conditions.
3. How to use segmentation for advanced targeting.
4. How to unlock more insights with custom profile fields.
Using Form-Based Personalization
Form submissions give you valuable insights into what your visitors want, and with PersonalizeWP, you can use that data to deliver a highly relevant experience. Here are a few ways to personalize content based on form submissions:
Target Visitors Based on Form Completions
Instead of showing the same content to everyone, you can create custom display conditions that tailor the experience based on the forms visitors have completed.
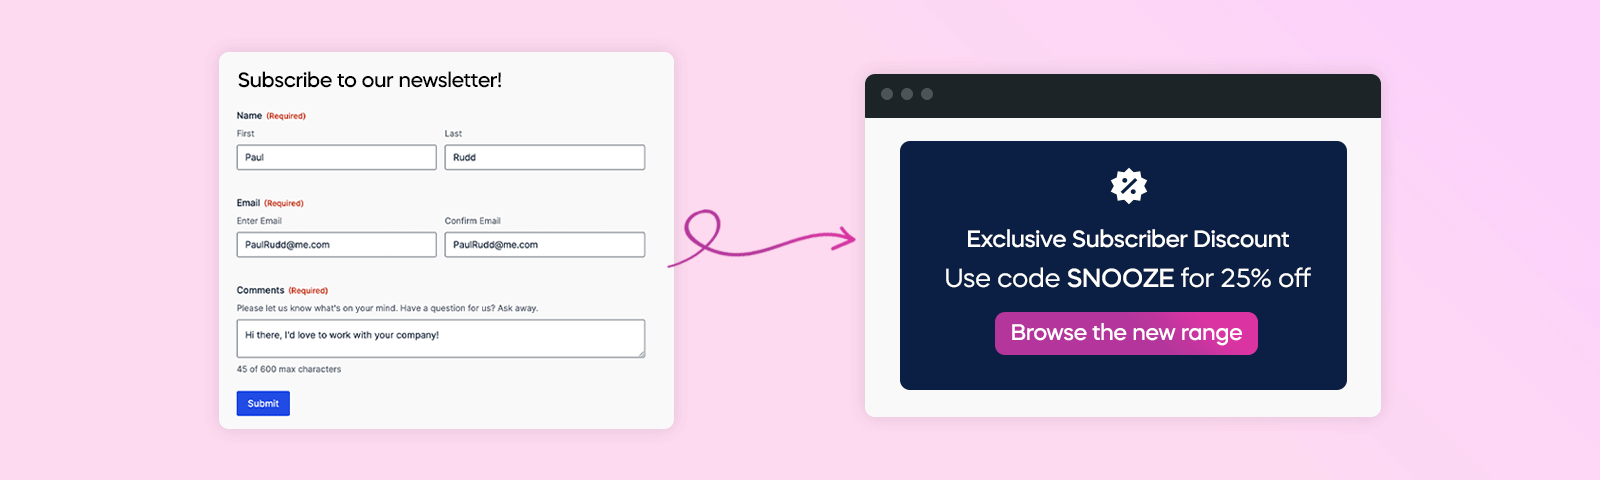
For example, if someone signs up for your newsletter, you can display exclusive member content. If they’ve requested a callback or more information about a service, you can guide them toward next steps.
Personalize Content with Custom Profile Fields
By mapping form data to custom profile fields, you can segment visitors based on their preferences and behaviors.
For instance, an events company could ask whether visitors prefer webinars or in-person events and use that data to show them relevant content. This way, each visitor gets a curated experience that aligns with their interests.
Use Form Data to Create a Personalized Experience
Make your website feel more personal by dynamically inserting form data into your content. If a visitor has provided their name, company, or job title, you can greet them with a tailored message like:
- “Hi Tom, welcome back!”
- “Looking to enhance your skills at Smith & Sons?”
How To Set Up Form-Based Display Conditions
Implementing form-based personalization with PersonalizeWP is a straightforward process.
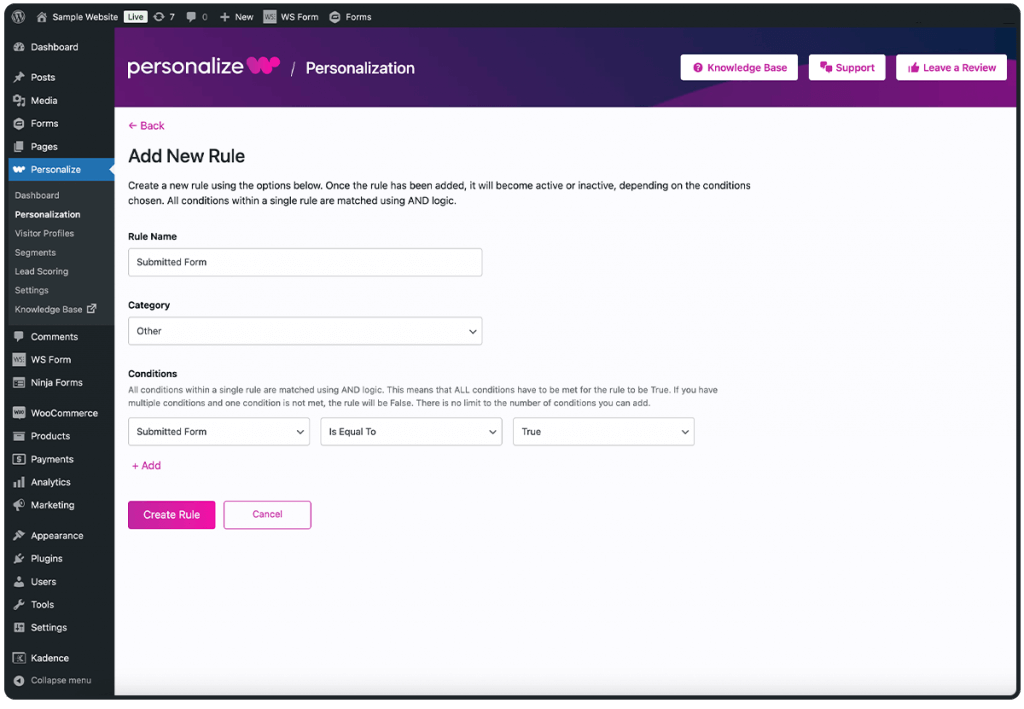
1. Start by navigating to WP-Admin > Personalize > Dashboard > Personalization to access the personalization rules interface. Here, you’ll find a list of existing rules and the option to create new ones.
2. To create a new rule, click Create Rule, give it a name, and assign it to a category.
3. In the conditions dropdown, select User Has Submitted a Form and choose whether the condition should be True (meaning the visitor has submitted a form) or False (meaning they have not).
4. After saving the rule, you can apply it to any content block in the WordPress Block Editor using the Personalize menu.
Using Form-Based Segments
Beyond individual personalization rules, PersonalizeWP allows you to create visitor segments based on form submissions. This enables more strategic content targeting.
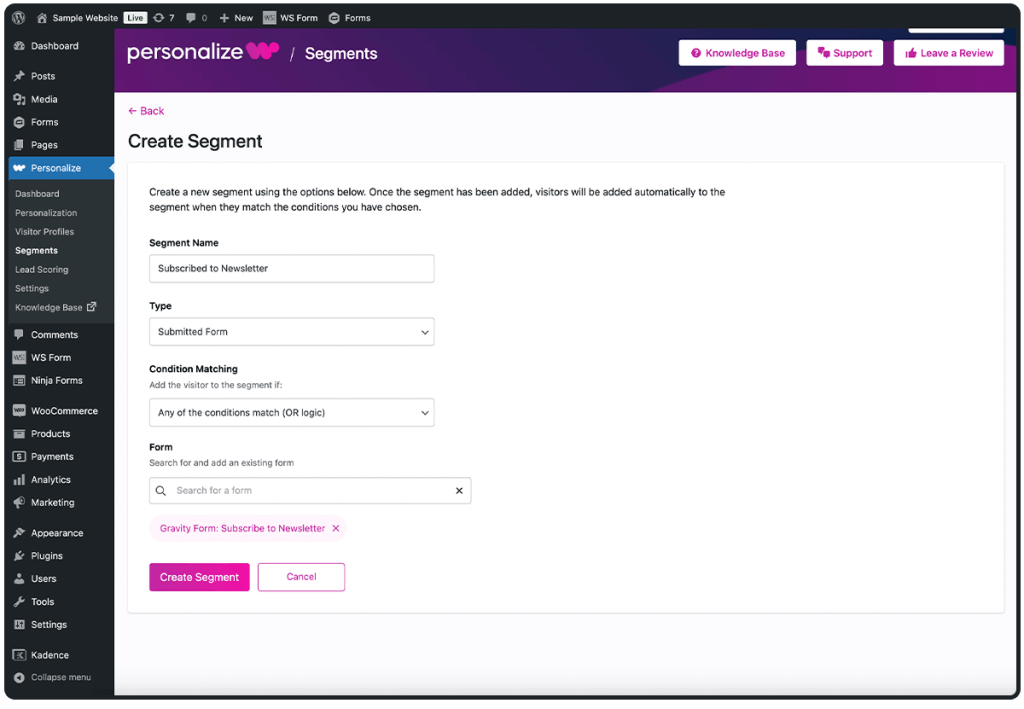
1. To create a new segment, go to your Personalize dashboard, select Segments (under Pro features) and click the pink Create Segment button.
2. After naming the segment, select Submitted Form as the type and choose the form(s) you want to track.
3. Once saved, this segment will automatically update as visitors submit forms.
Once a segment is created, you can use it to personalize content just like a standard rule.
4. Within the Block Editor, select a block and open the Segmentation options. From there, choose your form-based segment and specify whether the content should be shown or hidden for visitors in that group.
Unlock Further Targeting with Custom Profile Fields
To gain more actionable insights from your forms, you can add your own custom fields. These can be useful for creating content that targets a specific characteristic or a particular interest. To start using custom profile fields, follow these steps:
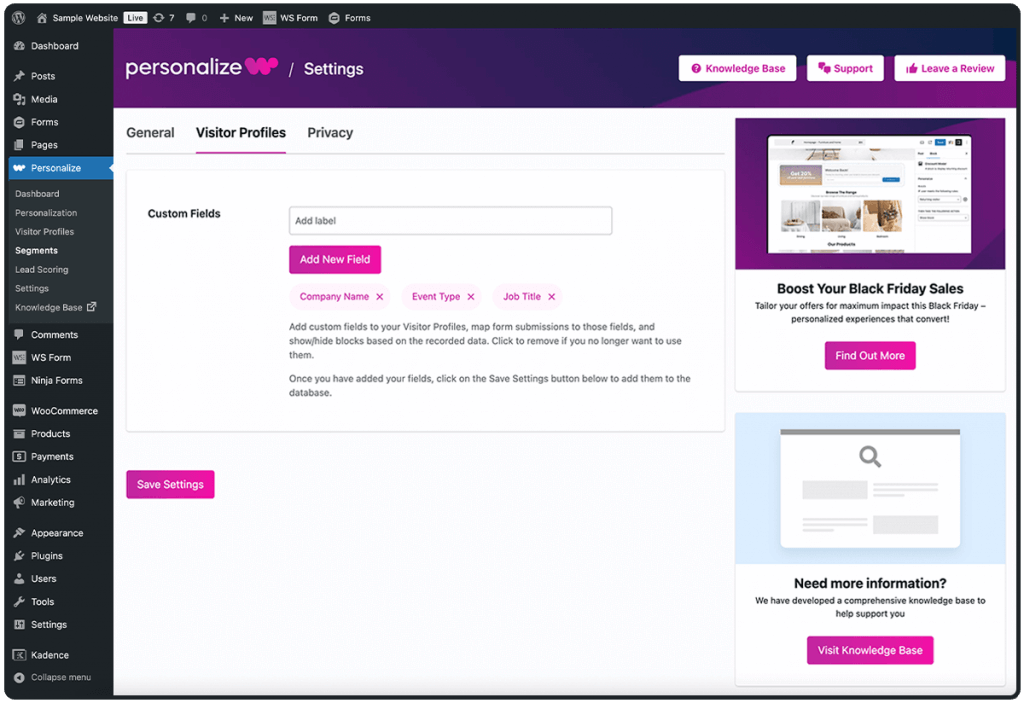
1. Navigate to your personalize dashboard and then click on settings.
2. Along the top you will see ‘General’, ‘Visitor Profiles’ and ‘Privacy’. Click on ‘Visitor Profiles‘ and you will be taken to the custom profile fields section.
3. Add an identifying label and click ‘Add New Field’ button, on our example you can see we’ve added ‘company name’, ‘event type’ and ‘job title’.
4. Navigate to a form you’d like to apply your custom profile fields to and go to the settings. Let’s say you’re using Gravity Forms for this example.
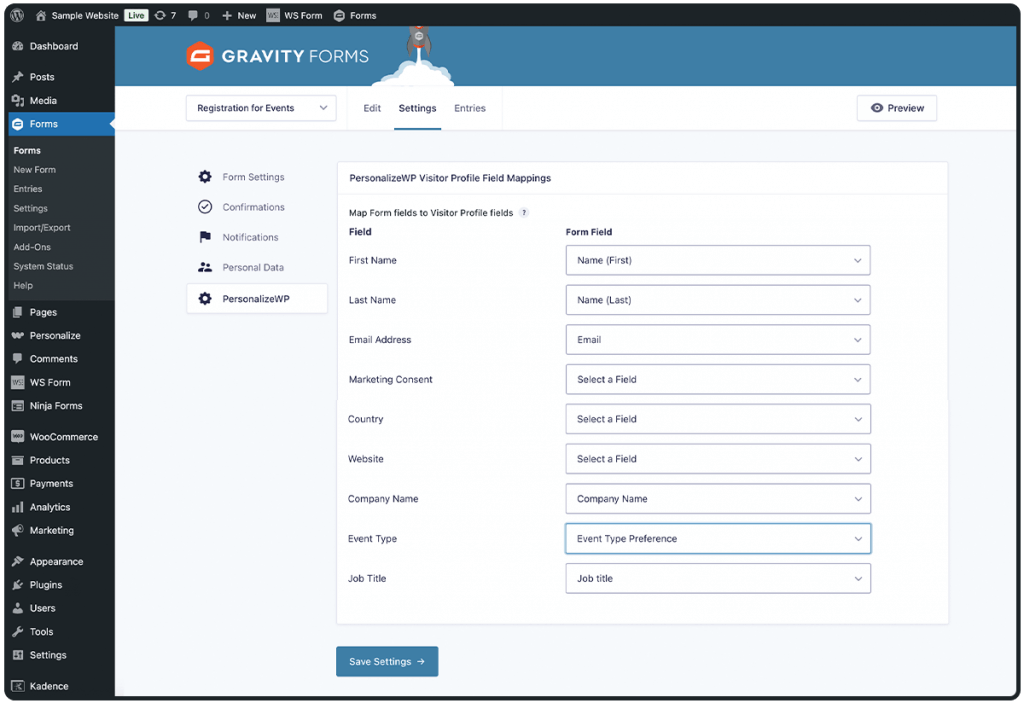
5. From the settings menu, at the bottom of the list you will see ‘PersonalizeWP‘. On this page you will be able to map the form fields to align with your custom profile fields.
On this example, you can see that we’ve matched ‘Event Type’ with our ‘Event Type Preference‘ custom field.
6. When you’re finished mapping the fields, click on the ‘Save Settings‘ button at the bottom.
7. Add Now you’re all set. You can start adding content targeting anyone who submits a form including your custom fields.
For example, we can now add content that targets the visitors event type preference. If they selected ‘webinar‘, we could add a block showing only the upcoming webinar information, instead of in-person events that they may not be interested in.
Get The Most From Your Form Submissions
Form-based personalization is a simple yet effective way to create a more relevant and engaging website experience.
By adjusting content based on visitor actions, you can ensure that each person sees messaging that aligns with their needs and interests. With PersonalizeWP, implementing these strategies is easy, allowing you to optimize user engagement and improve conversions effortlessly.
If you’re ready to take your personalization efforts to the next level, start using form-based personalization to enhance your website experience!