Getting Started
Find out how to get started with PersonalizeWP – our no-code personalization plugin for WordPress websites.
The instructions below will get you up and running in no time at all!
Install and Activate the Plugin
Once you’ve downloaded the plugin, you need to install and activate it on your site. To do this, go the Add New Plugin page and click on the Upload Plugin button in the top left hand corner.
On this screen use the Choose file option to select the file on your computer and click on Install Now.
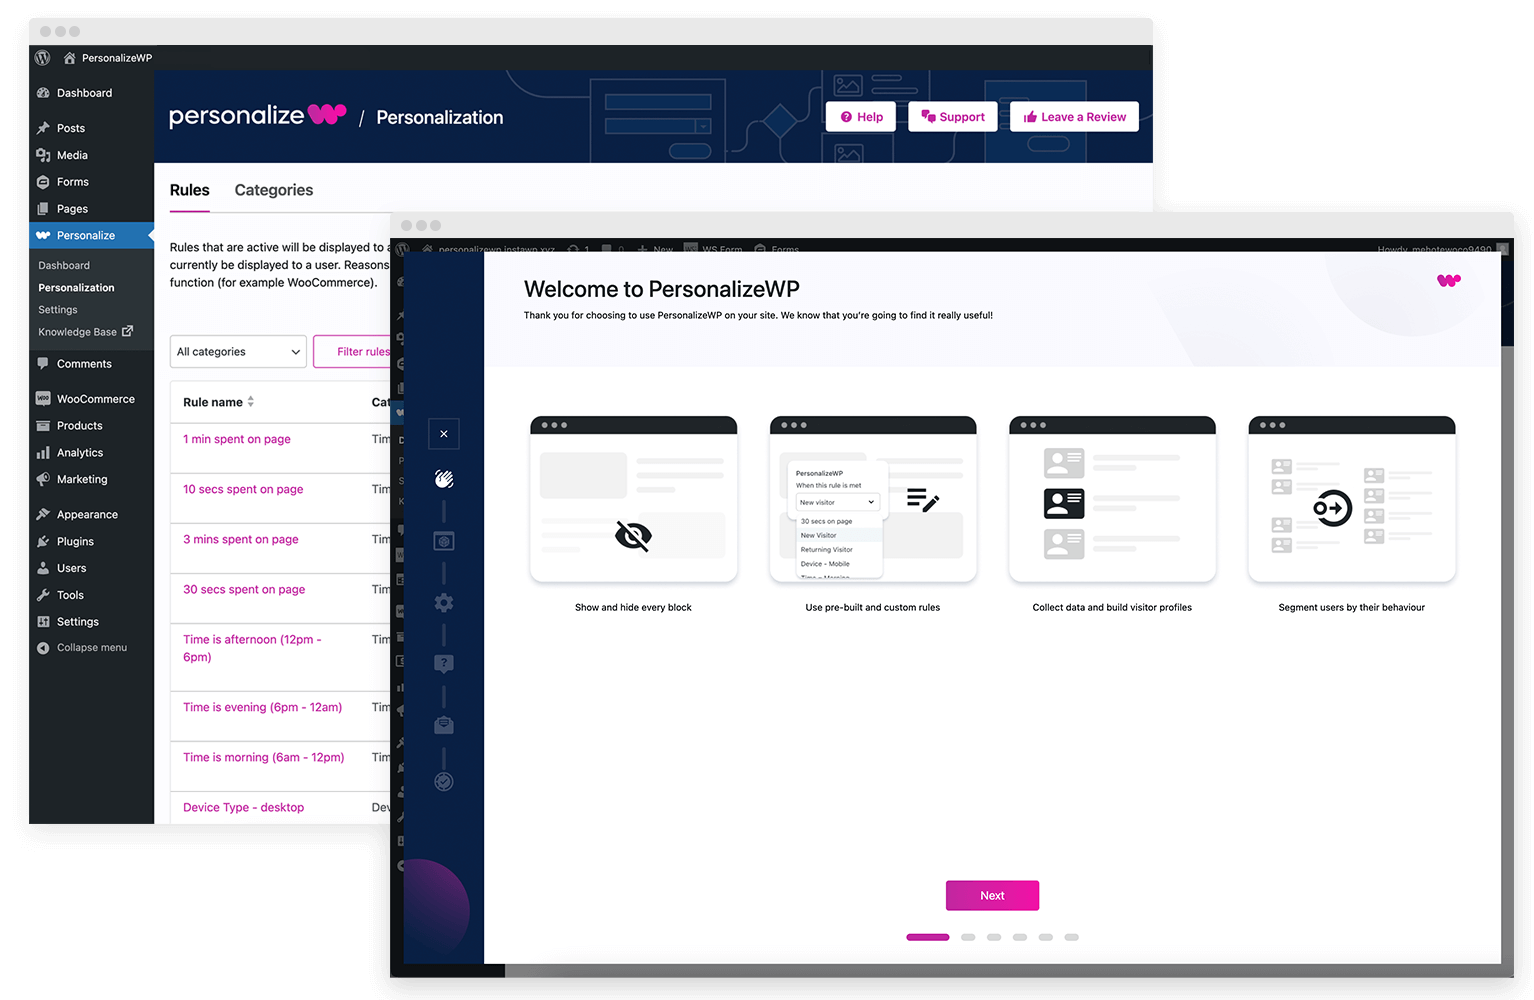
Create your first rule
We’ve only scratched the surface of what is possible with our default rules! PersonalizeWP offers incredible flexibility for you to come up with your own custom rules based on a wide range of conditions and parameters.
You can create unlimited custom rules in PersonalizeWP and use them across your site to show and hide content to your visitors. And if you want more, let us know what you think we could add, we’re always interested in hearing what would help you.
Show/Hide your first block
You’re now ready to start using PersonalizeWP to show or hide content on your site.
Simply visit one of your site pages or posts, click on a block and then choose a rule in the Block Editor sidebar. You can add multiple rules, and you can decide if you want to show or hide the block if the visitor meets the criteria. Once you save the page, it starts working straight away.
Check out the advanced features
Once you’ve personalised your first block, take the time to find out more about the advanced features in the plugin to help you in your personalisation journey.
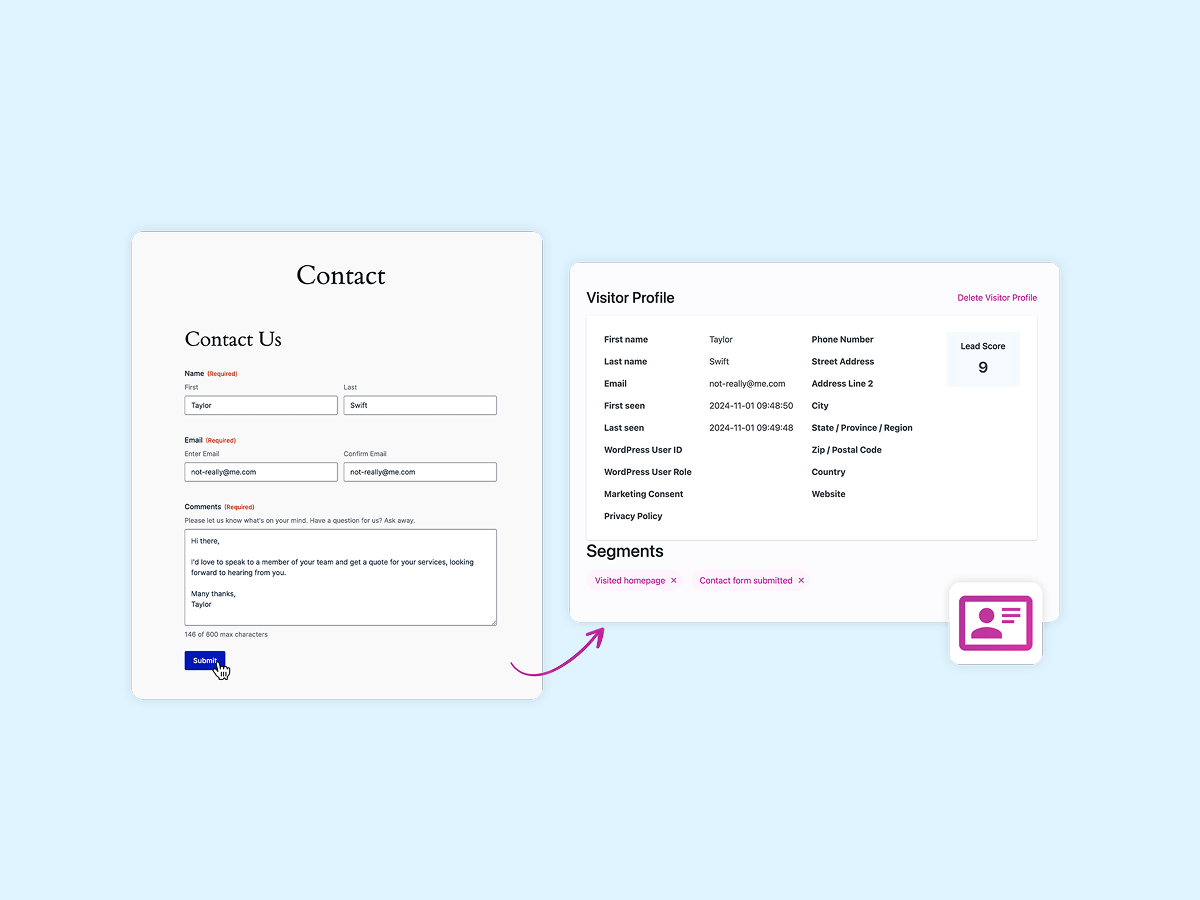
Visitor Profiles
Track and analyze individual visitor behavior to create detailed profiles, then display user profile information in your content
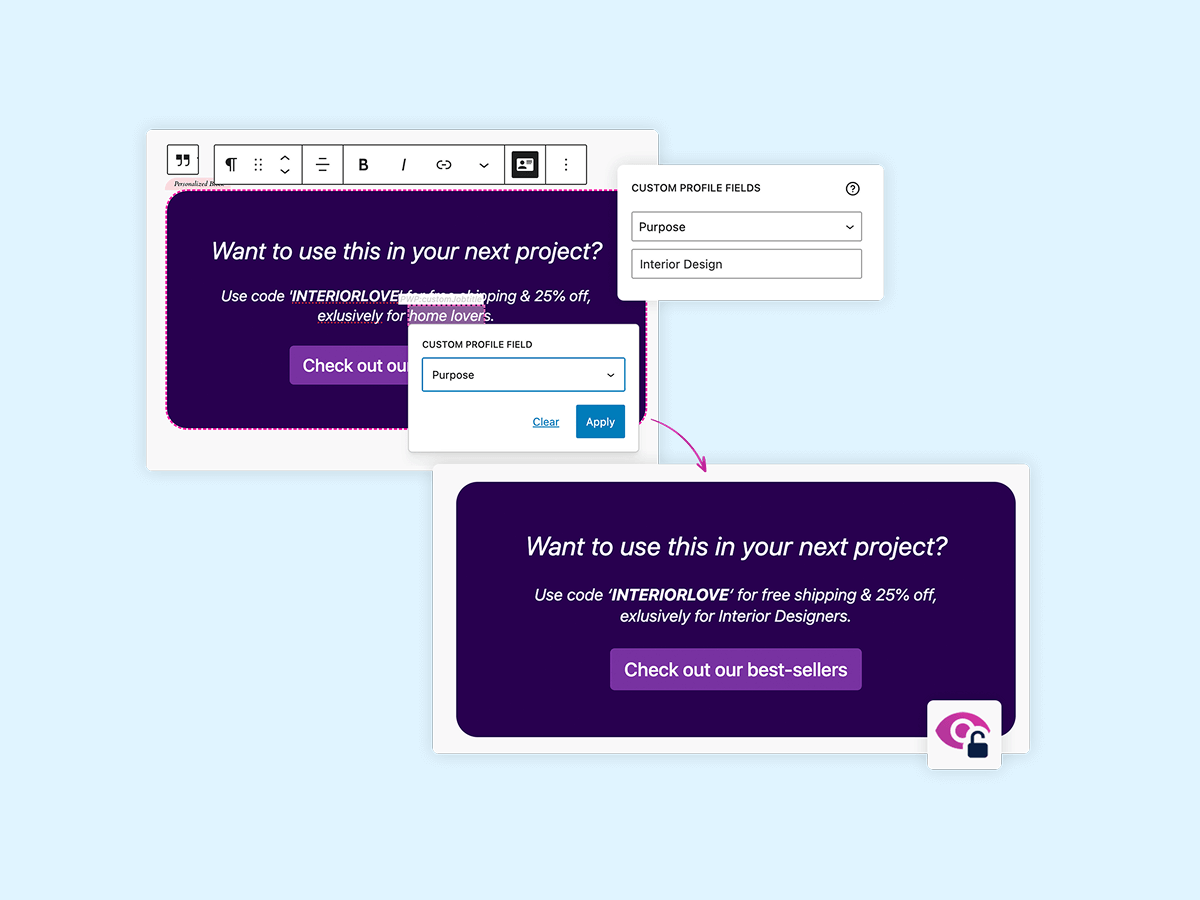
Custom Profile Fields
Capture information from your visitors to help personalize their experience on your site
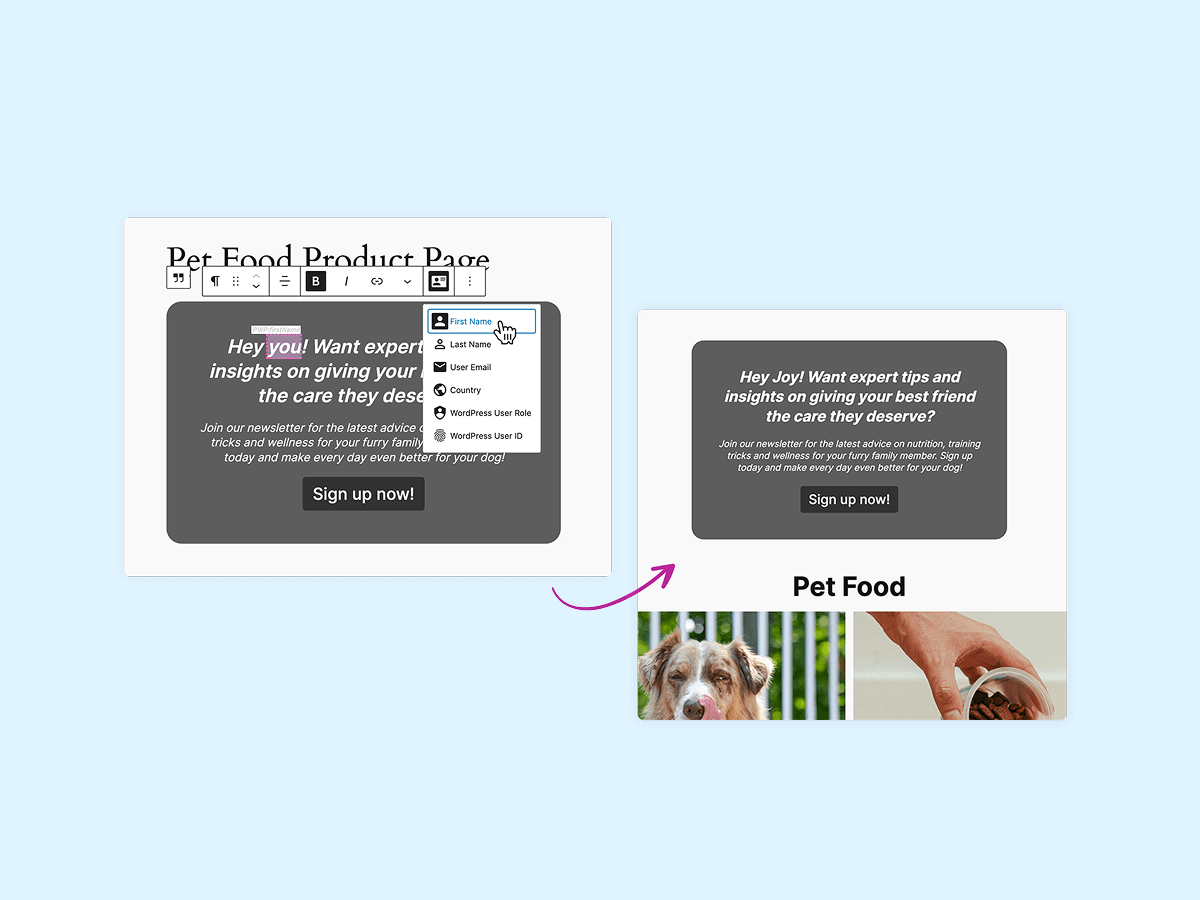
Display Data in Content
PersonalizeWP allows you to display your visitor profile data fields in content blocks that then appear on your website allowing you to personalize your messaging
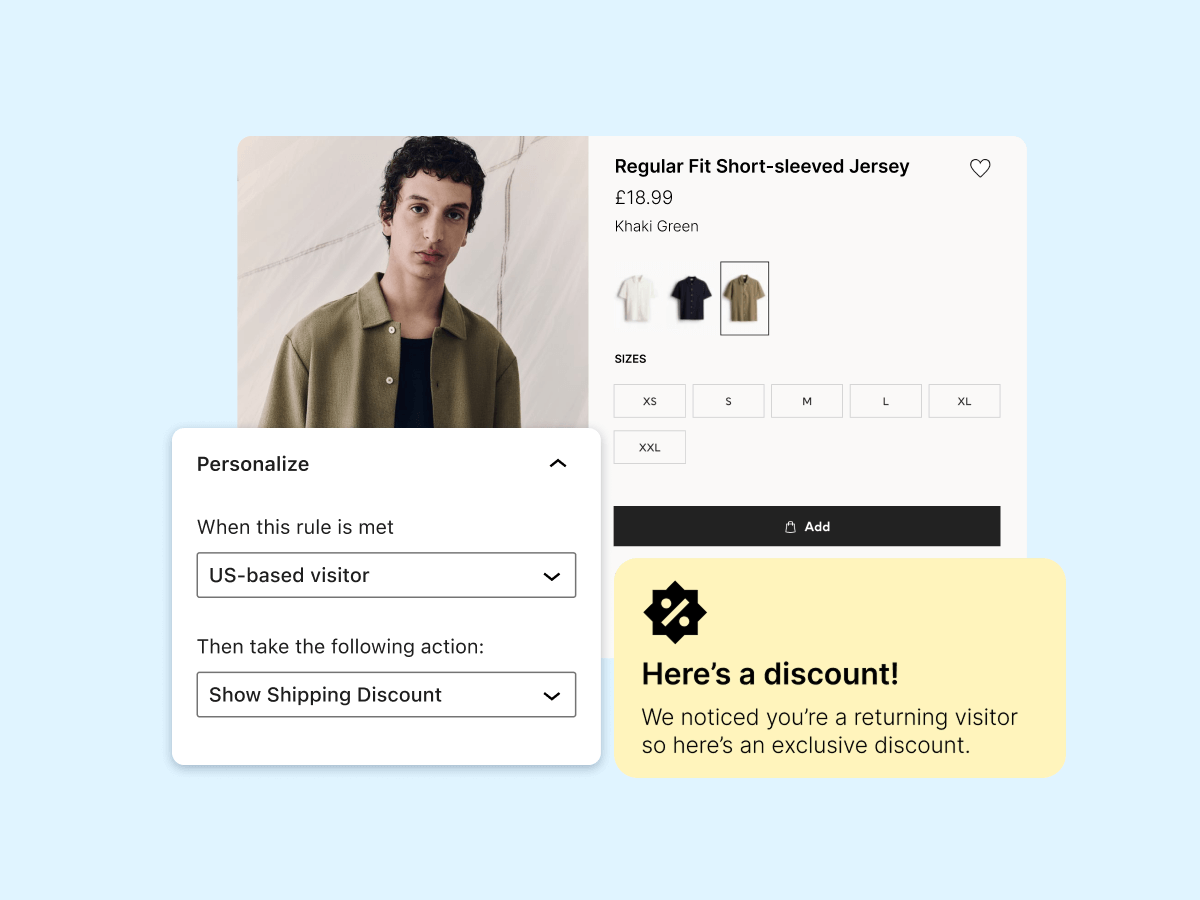
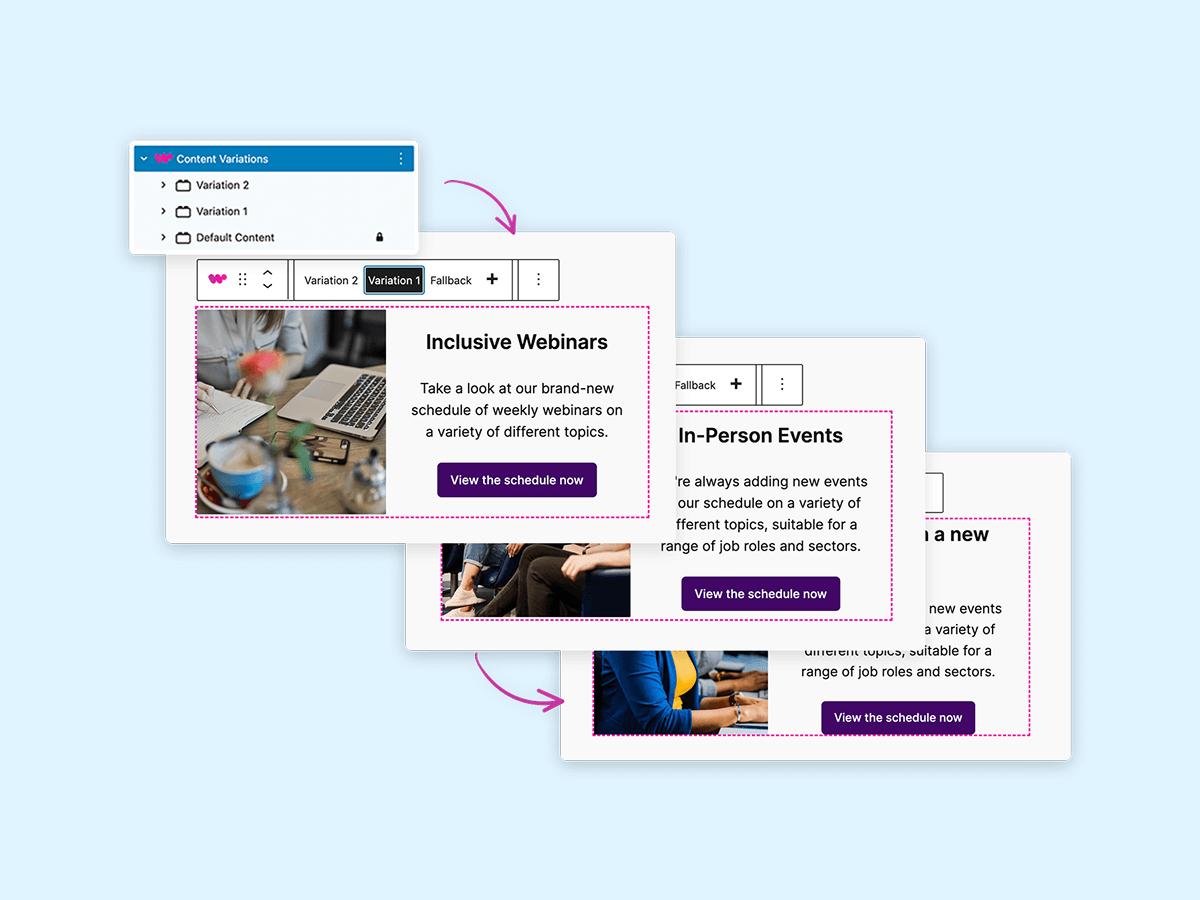
Content Variations
Effortlessly show different versions of your content based on rules, segments or lead scores, all in one simple block.
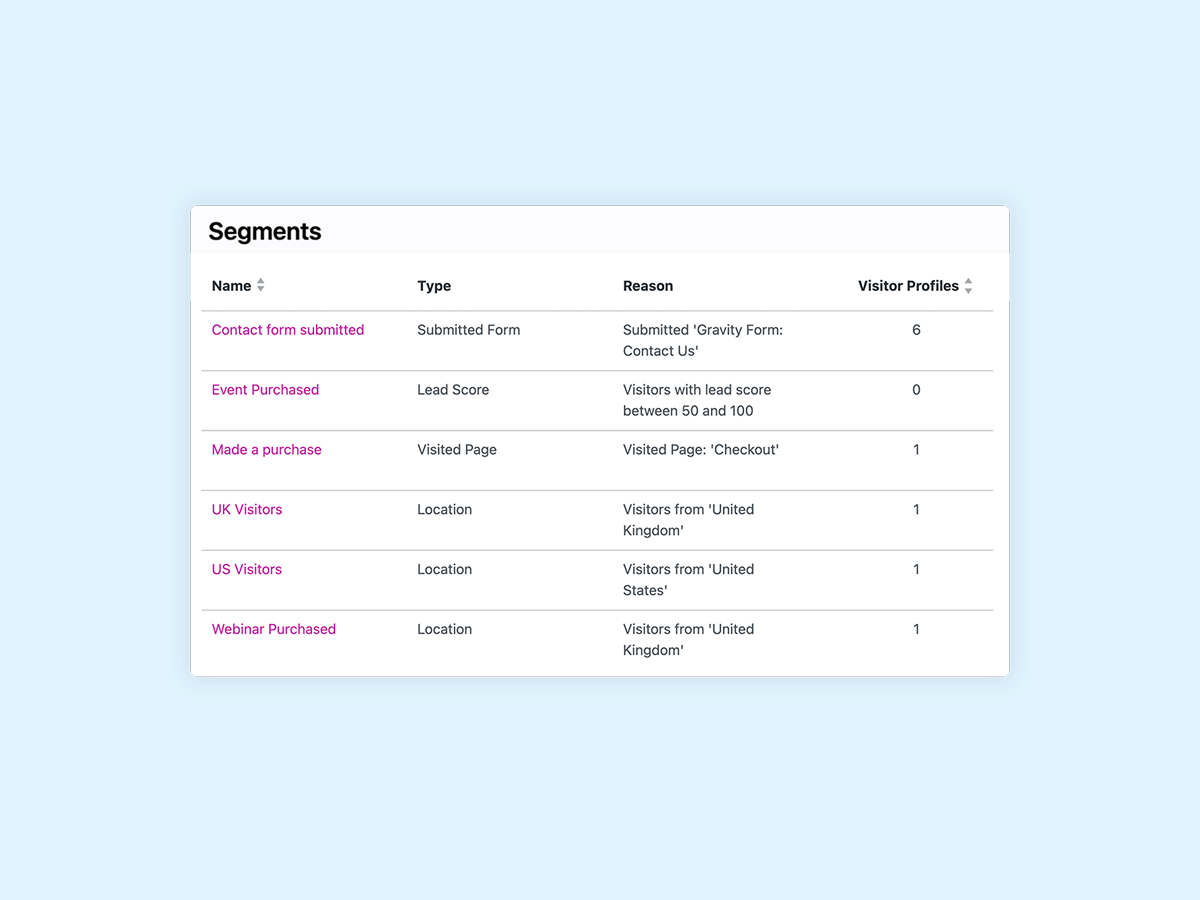
Segments
Group your audience based on specific criteria to personalize to groups
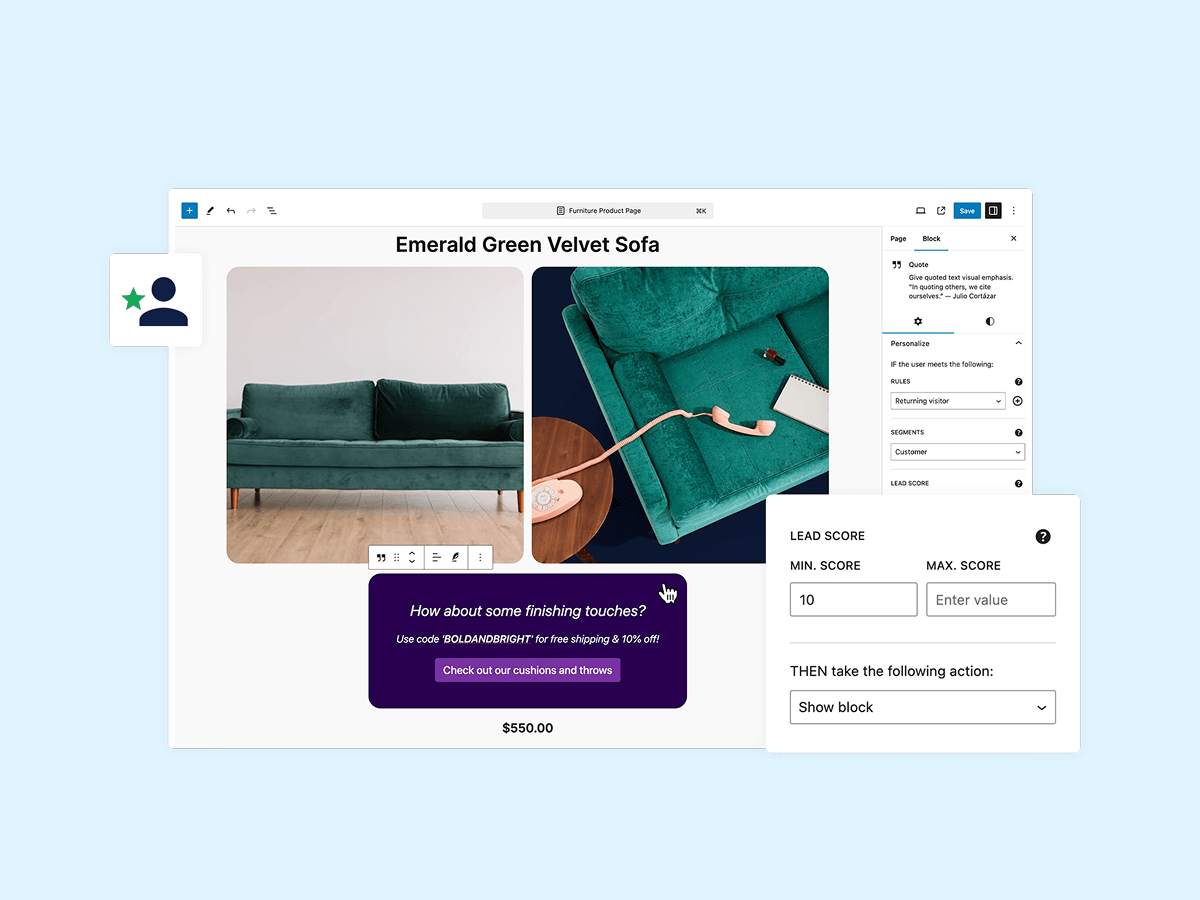
Lead Scoring
Assign scores to leads to prioritize follow-up based on their value
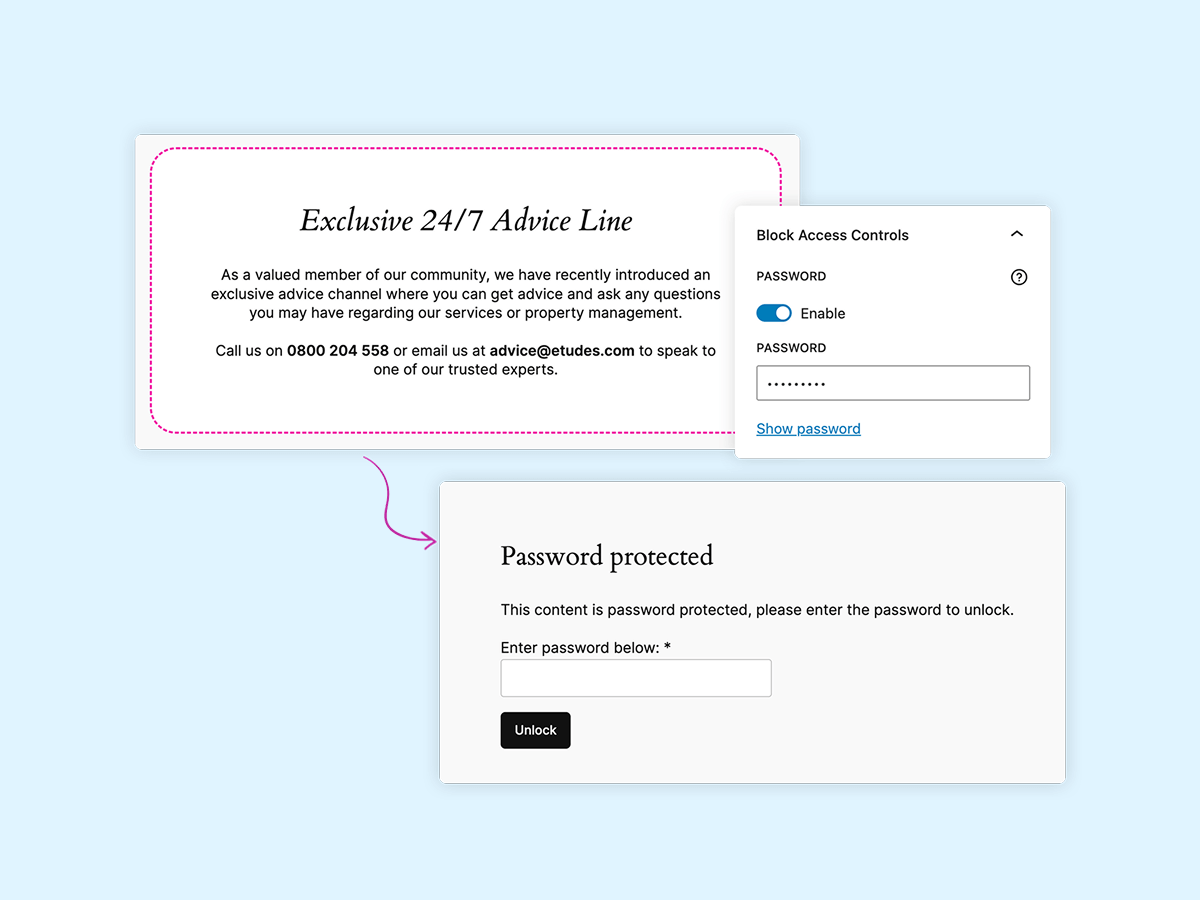
Access Controls
Secured with role-based access, passwords, and user ID restrictions
Integrations
Seamlessly integrate with plugins like WooCommerce and Gravity Forms
And there’s more!
Read through our documentation, check out our blog and watch our instructional videos to find out how you can use the features in PersonalizeWP to improve your website experience.
How-Tos
Find out how to achieve what you need with our tutorials and how-to guides, including examples of how and where you can add personalisation.
See our How-Tos
Knowledge Base
In our Knowledge Base, we provide details of how to work with every type of personalisation rule and what you can achieve with them.
Go to the Knowledge Base
Announcements
Go here to see updates and announcements of new features for PersonalizeWP, and signup to our newsletter to be the first to hear about them.
Read our announcementsNeed more help?
Want us to set up and configure PersonalizeWP for your specific needs? Looking for custom features, priority support, or integration with your existing systems?