How to Create a Seasonal Advent Calendar for Your WordPress Website
Discover how to create an advent calendar on your WordPress website using PersonalizeWP, transforming holiday traffic into repeat visitors and boosting conversions with daily surprises that keep your audience coming back for more.
Learn how to craft a seasonal advent calendar for your WordPress website, boosting engagement and conversions by revealing exclusive content or offers each day.
This guide will walk you through setting up a countdown to the holidays or any other seasonal event using PersonalizeWP, turning daily visits into a fun and interactive experience.
The holiday season offers an incredible opportunity to engage visitors with unique, time-sensitive content. From holiday deals to daily surprises during the 12 Days of Christmas, an advent calendar encourages visitors to return regularly, driving your engagement and boosting conversions.
Whether it's for Christmas, Thanksgiving, Black Friday, Cyber Weekend or January sales – seasonal countdowns can enhance visitor experiences and keep them coming back for more.
What You’ll Learn
- Why an advent calendar can improve engagement
- Benefits of using PersonalizeWP’s date-based conditions
- Step-by-step guide to creating your own advent calendar
- Tips for maximizing conversions during the holiday season
Why Create an Advent Calendar?
An advent calendar can be a game-changer for websites during the holiday season, and here's why:
Increase Engagement:
rnAn advent calendar gives visitors a reason to check back daily, creating anticipation and excitement for each new offer or piece of content.
Boost Conversions:
rnDaily reveals of special discounts, limited-time deals, or exclusive content can lead to higher conversion rates. Visitors are more likely to make a purchase when they feel they're getting something special.
Seasonal Connection:
rnTapping into the holiday spirit through an advent calendar builds emotional connections with your audience, enhancing the customer experience.
How to Create an Advent Calendar Using PersonalizeWP
Creating an advent calendar is simple with PersonalizeWP's "Date" display condition. Here’s how you can set it up:
1. Create your custom conditions/rules
rnNavigate to the PersonalizeWP Dashboard, then click on 'Personalization'. From here you can click on the pink 'Create Rule' button to get started.

2. Create date-based display conditions
rnYou’ll need to create a display rule for each day leading up to Christmas (or your chosen event). If you’re planning a 12 Days of Christmas calendar, for instance, you will create a new display condition for each of those 12 days.
To do this:
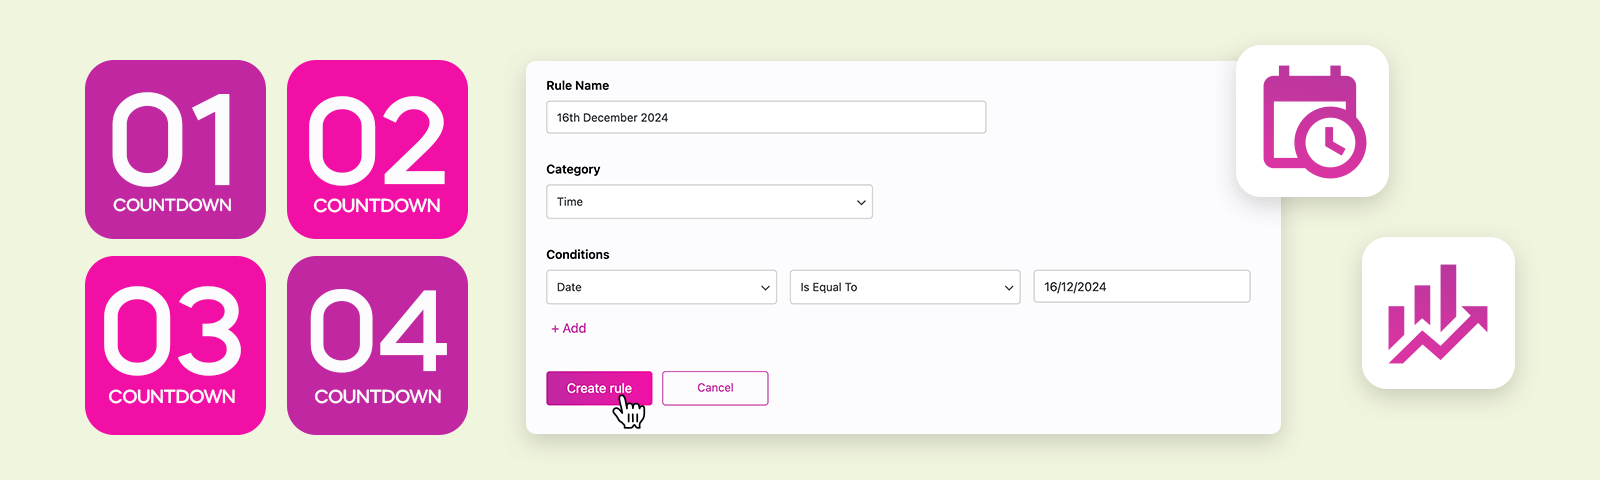
Add a new rule and give it a title, such as "Day 1 Offer" or "Christmas Eve Special".
Select the Time category and set your condition to Date > Is Equal To > [insert date here].
Click the pink Create Rule button to save your condition.rnThis will ensure the content block appears only on the chosen date.
Repeat this process for each date leading up to the event.

3. Show different content blocks each day
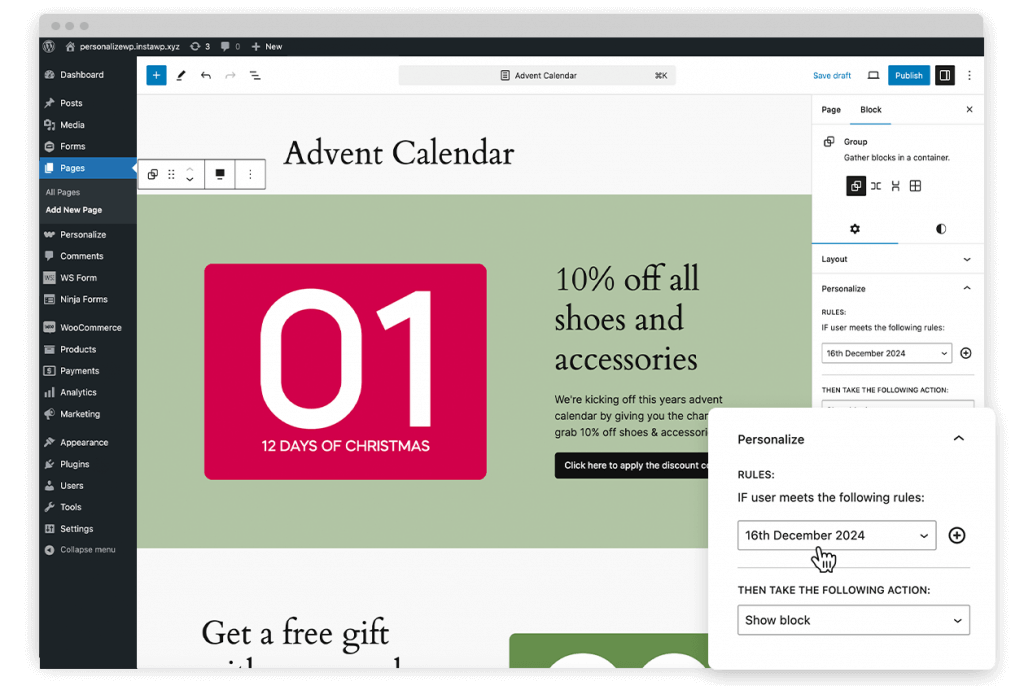
rnYou can create unique content for each day of your advent calendar by applying these rules to different content blocks.
For example, on December 1st, you might reveal a discount code, and on December 2nd, a free downloadable guide.
PersonalizeWP will handle the display, ensuring that visitors only see the relevant content on the designated day.
You can choose to create a landing page to direct visitors to which showcases all of your offers OR you can simply add blocks to existing pages, such as your homepage.
Optional: Display all advent calendar blocks after a specific date
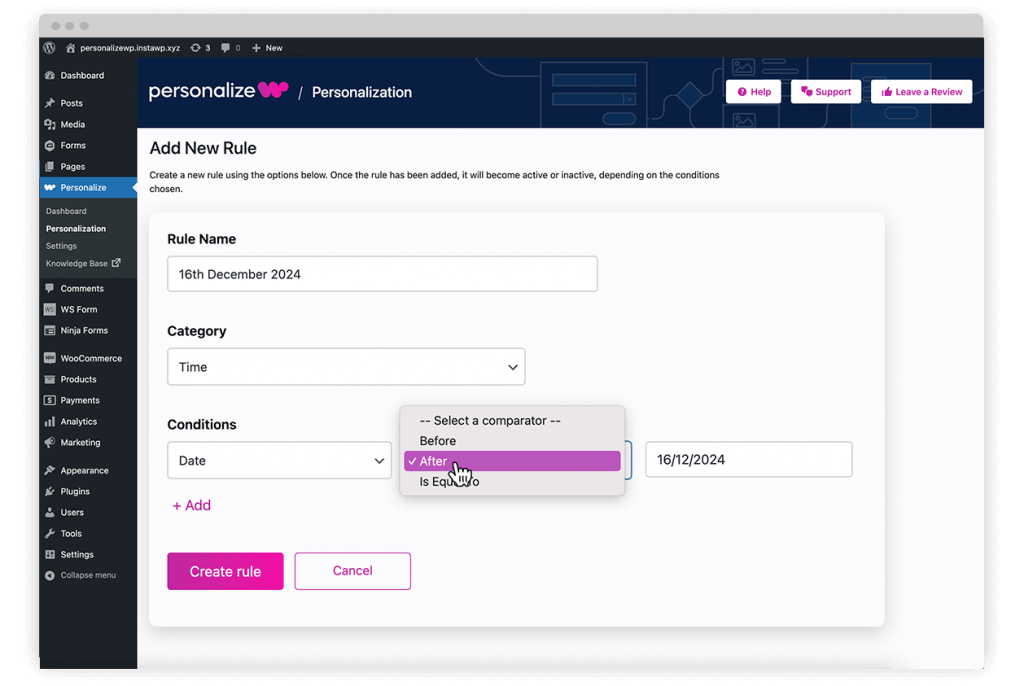
rnIf you'd like to keep past offers visible for your visitors (instead of disappearing after their specific date), you can set the conditions to show all previously revealed content.
When creating the display condition, instead of choosing "Is Equal To," you will need to select Date > "After" > [insert date here].
This method is great if you're creating a separate landing page and you'd like your visitors to see all of the previously revealed offers.
Note: Don't forget to make your page private after your offers have ended!
Maximizing Your Advent Calendar’s Impact
To get the most out of your advent calendar, here are a few tips:
Combine Conditions for Better Targeting
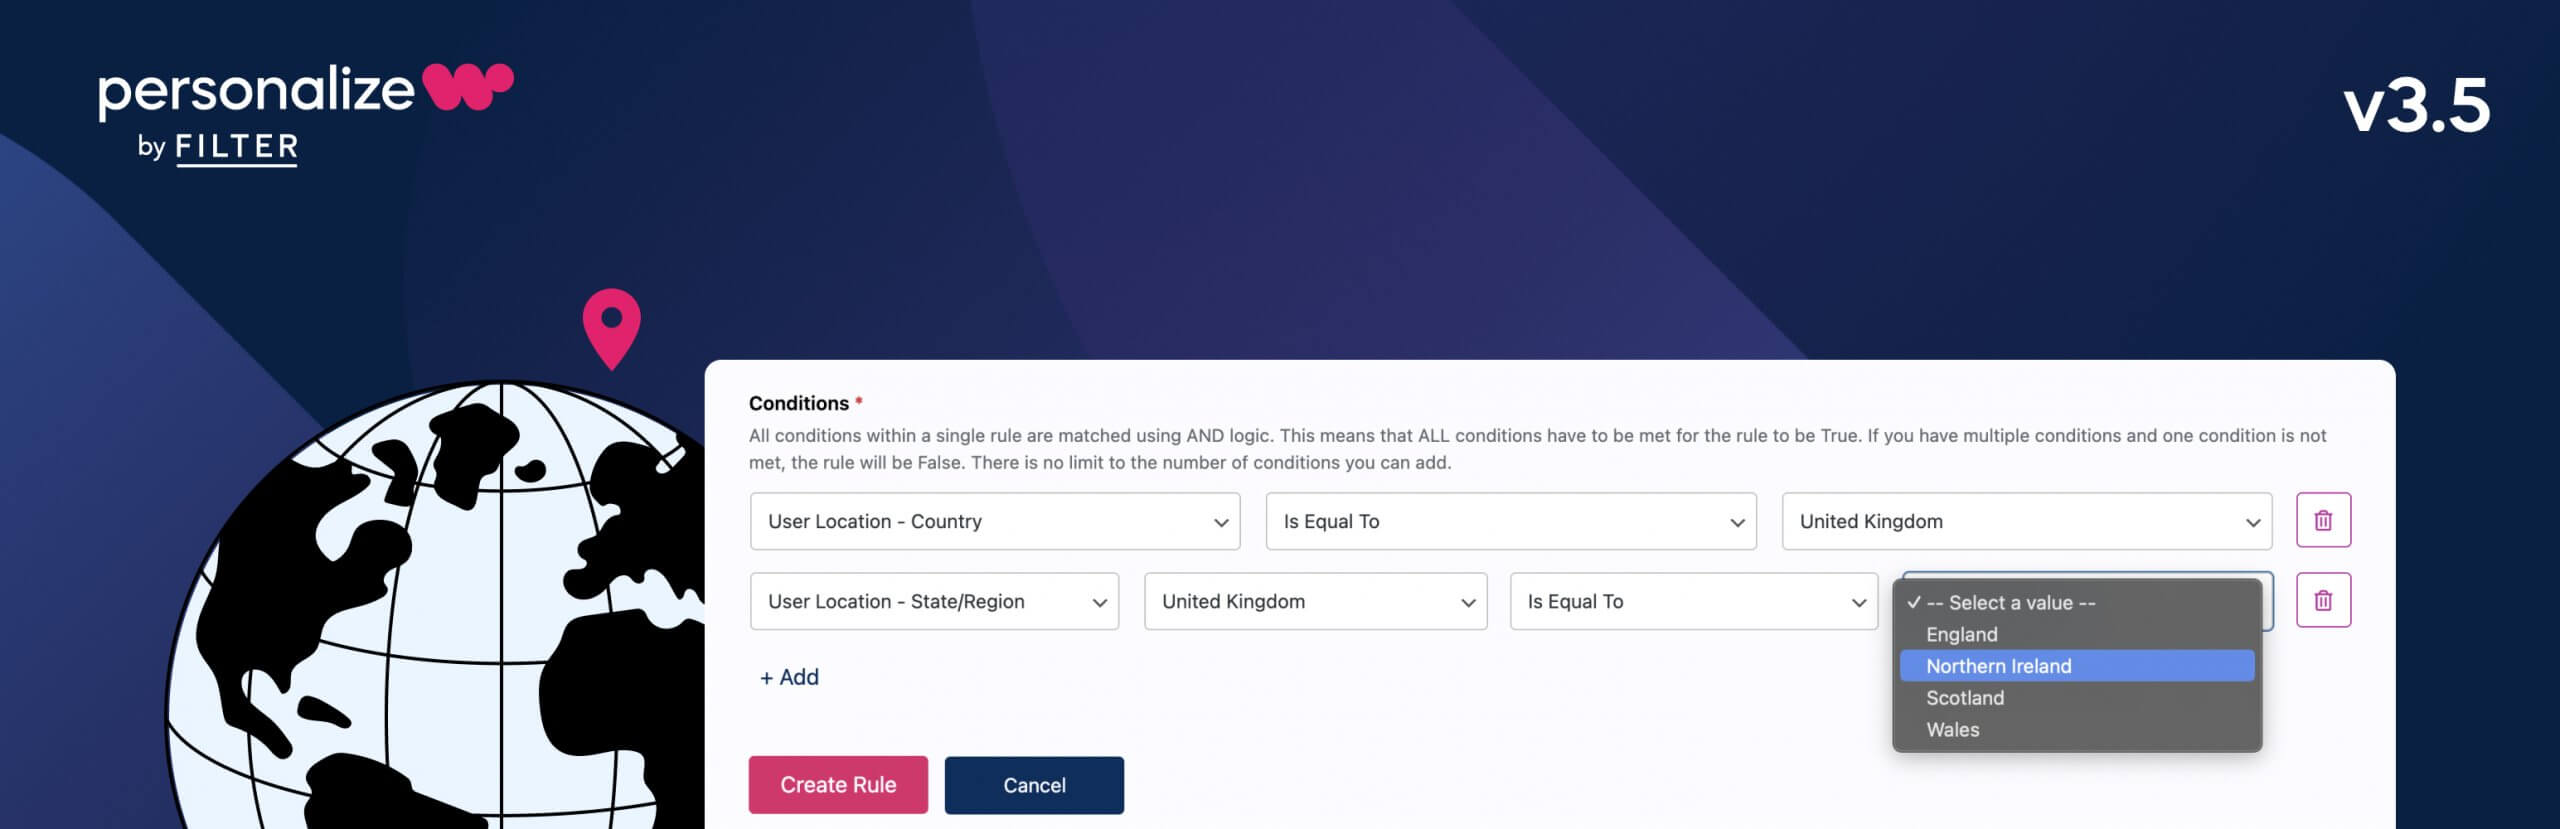
rnIf you want to get even more creative, try combining date-based conditions with other rules. For instance, you could display different rewards or offers based on visitor location. These personalized touches can make your advent calendar even more engaging.
You can create an unlimited amount of custom display conditions and you can apply multiple conditions to any content block by clicking the '+' button in the Personalize block menu.
Incorporate Countdown Features
rnAdd a sense of urgency with countdown timers, letting visitors know when the current offer will expire.
PersonalizeWP allows you to combine its Time of Day and Date conditions for precise control over when content appears or disappears.
Promote Heavily Across Channels
rnMake sure you’re promoting your advent calendar through social media, email and other marketing channels. Highlight the daily reveals to get more traffic to your website.
You could even go one step further and make your content blocks password protected and direct visitors towards social media or other channels to find it, making it seem even more exclusive.
Get Started with PersonalizeWP…
Download our innovative WordPress plugin for FREE and get started today! PersonalizeWP is packed with easy-to-use personalization display conditions.
If you’re looking for even more functionality like visitor profiles and audience segmentation, upgrading to PersonalizeWP Pro unlocks our more advanced features. These tools help you target high-quality opportunities and deliver personalized content when it matters most.